Discover the secrets of seamlessly transferring chats from Virtual Agent to Live Agent with the help of Advanced Work Assignment and selectable queues. Uncover the step-by-step process of setting up context variables, creating queues, and configuring the Virtual Agent Designer for a flawless chat transfer experience.
It's a common occurrence for customers to have unique queues in connect chat, where they can choose to be transferred to a live agent from a specific support group while interacting with the Virtual Agent.
Normally it's achieved by simply adding a line of code to assign the user selected Connect Chat sys_id to vaVars.LiveAgent_queue and then the chat gets nicely transfered to the agents in the group assigned to that queue.
However, once we install Agent Workspace, this method will no longer work, since Advanced Work Assignment takes over and the setup is different. Documentation on handling this is a bit lacklusters and tutorials usually cover simple situations like setting up queues based on user's languguage or location. The ability for the user to select a specific queue and have the chat be tranfered there isn't really covered.
There is however a way this can be achieved
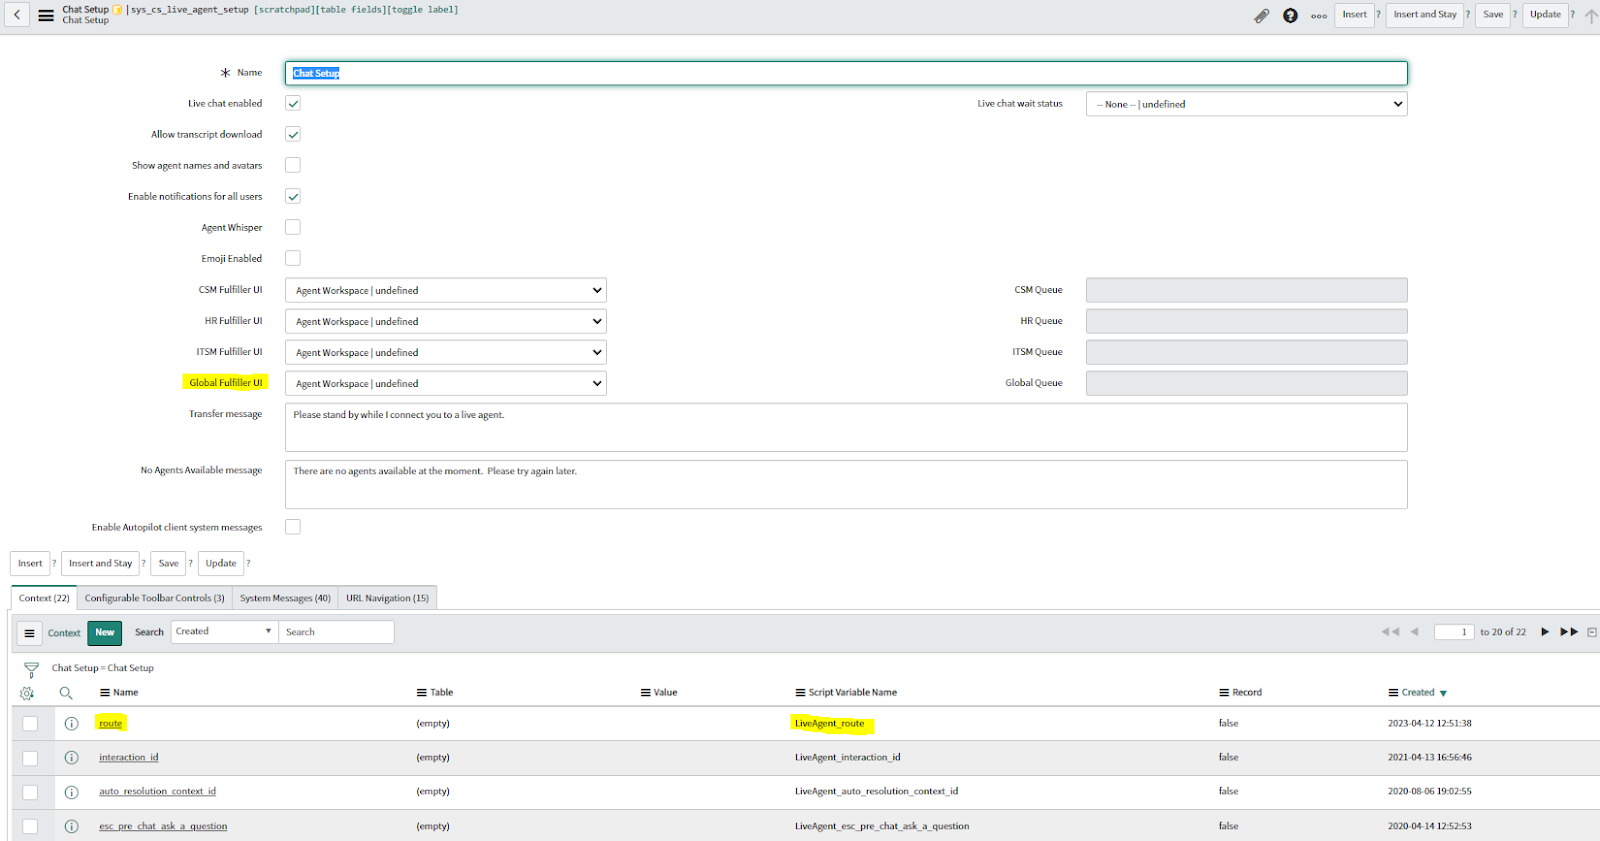
First we need to go to Chat Setup. With recent releases this is no longer listed in the navigator, so we will need to use the table name 'sys_cs_live_agent_setup'. I suggest bookmarking this, if you are working with Virtual Agent often.
We need to make sure that the 'Global Fulfiller UI' field is set to Agent Workspace. Next we need to create our context variable, which we will use to route the conversations to proper queues. Scroll down to the related lists, first tab should be context, click 'new'. Name the record to the VA variable you will want to user, for example 'route' and submit the record. Table and value fields should be left alone. Notice that this will automatically create a Script Variable in our case called "LiveAgent_route". This happens automatically.
The next step is to create our queues.
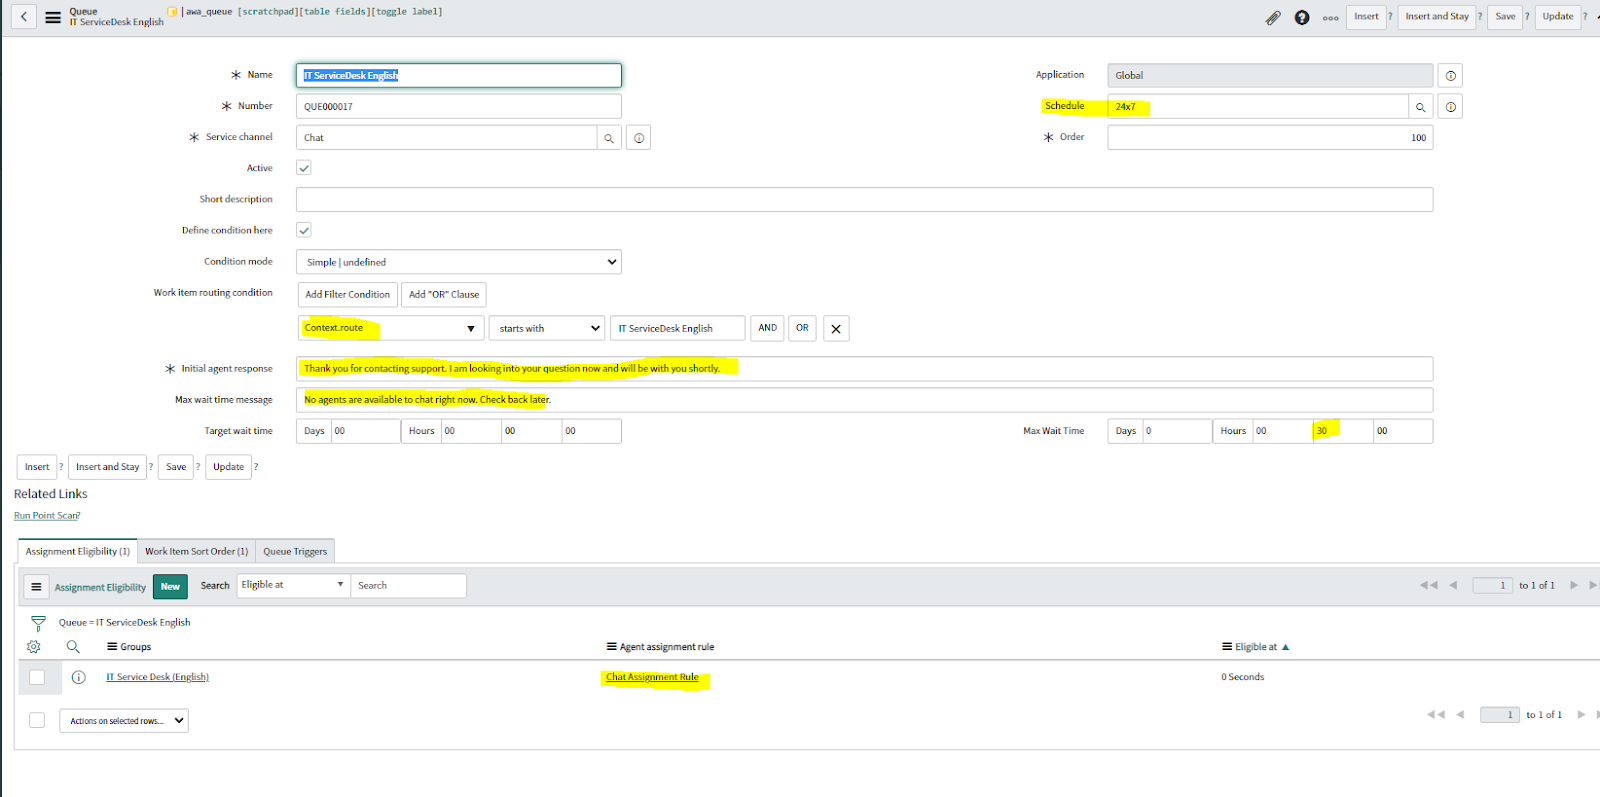
Navigate to Advanced Work Assignment > Queues and click 'new' on top of the list.
Name the queue something, ideally what you will want to display in the VA conversation options for the end user. In Service Channel, select 'Chat'. Assign a schedule that the agents in the groups operate by, you can create a cutom one if you need something specific. Otherwise Weekdays 9-5 or 24x7 are popular choices. You can set the Max Wait time, if no agents pick up the chat past that time, the conversation will time out. You can also define custom messages for Initial Agent Response and Timout response.
Next, go into related lists, select the Assignment Eligibility tab and click 'New'. In the record for 'Agent assignment rule' field select 'Chat Assignment Rule' and in groups select the groups that will provide support for that queue. Don't touch the 'Eligible at' field, leave it at 0. Submit the record and go back to the queue.
In 'condition mode' select 'simple'. Now to configure the 'Work item routing condition'. Select 'show related fields' and go to 'context > Interaction context fields' and select the field you created in the first step, for our example this was called 'route' chose starts with and enter the queue name that the user will select in VA. Save the record.
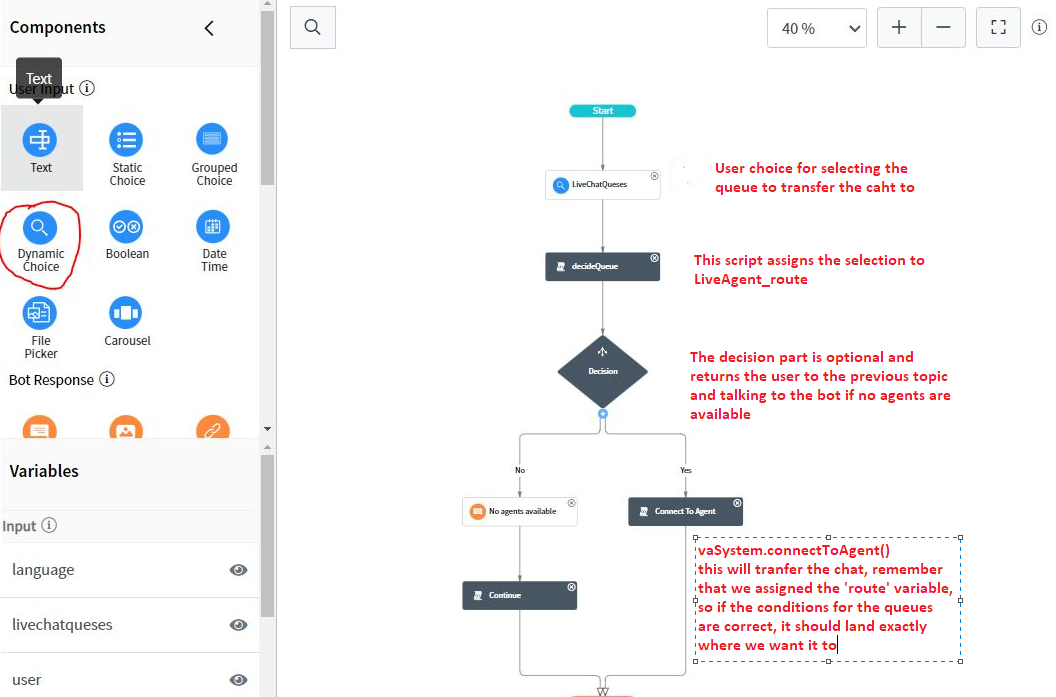
Now we need to go to Virtual Agent Designer.
Select the topic you use for tranfering to Live Agent. If you're using the OOB one, you'll need to create your own and configure everything.
In my case there are two queues I want the end user to be able to select to tranfer to the correct agent group.
We want to use the 'dynamic choice' option from 'user input' section. Configure you name and prompt for that and set 'define choices' to script. Now for the script:
var options = [];
options.push({ 'value': 'IT ServiceDesk'}, {'value': 'HR Service Desk'});
return options;
Create a new script box in the flow and assign LiveAgent_route variable with the value from the previous step.
For example:
vaVars.LiveAgent_route = vaInputs.liveChatQueues;
After that if you use vaSystem.connectToAgent() it will tranfer the chat to the agents in the groups mapped to that queue.
It's also a good idea to use vaSystem.isLiveAgentAvailable() before, though it's not required and the vaSystem.connectToAgent() will return a message if no agents are available anyway.
Please note, for the chat to be transfered to the agent's inbox, the agents need to have the following roles: awa_agent and agent_workspace_user and have their status set to available in Agent Workspace.